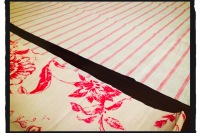
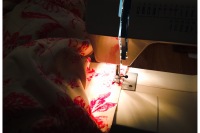
One of the biggest decoration challenges at Le Manoir Saint Gervais has been finding curtains to fit the enormous windows… there are ten of them! The drop (from pole to approx. 5cm from the floor) is 310cm. It would have been possible to buy made-to-measure curtains, however, with ten windows it starts to get a little pricy and I really wanted to make my own!
I looked in local shops and online for fabric but couldn’t see anything that would work. I then found some ready-made vintage floral curtains and thought I would have a go at deconstructing a couple of pairs to recreate the length I needed.
It was a bit of an experiment: I used one long pair and added a second, shorter pair of the same width. Despite a faint seam across the lower half of the curtains (which is difficult to see because I was able to pattern match) I am very pleased with the overall result:
If you would like to do the same, follow the 10 steps below. It took me less than a day to plan, unpick, pin, sew, finish and iron one pair of lined curtains:
You will need:
– 1 pair of the longest curtains you can find (e.g. standard drop of 228cm).
– 1 pair of shorter curtains (e.g. drop of 137cm).
NB: both pairs should be the same width (e.g. mine were 117cm wide).
Method:
Step 1: Work out your measurements: these were mine:
– Total drop needed for both curtain panels: 313cm (310cm plus 3cm for French seam allowance in shorter curtain)
– Longer curtain panels: 228cm (228cm)
– Shorter curtain panels: 85cm (82cm plus 3cm French seam allowance)
Step 2: Shorter curtain panels: keeping the bottom hems of the lining and fabric together, measure up to 85cm and cut off the top part containing the heading tape (cut through both the lining and fabric – you may want to pin it together first to stop it slipping). Note: the hemmed end of the lining will be a little shorter than the fabric.
Step 3: Shorter curtain panels: using a quick unpicker, remove the lining from the fabric; lay aside both pieces.
Step 4: Longer curtain panels: using a quick unpicker, and starting from the hemmed bottom, remove the lining from the fabric for approx. 20cm. Note: you could remove the lining all the way up to the heading tape but I found this was unnecessary.
Step 5: Longer curtain panels (front fabric): using a quick unpicker, unpick the hem and unfold. Now cut along the fold line that formed the original bottom edge of the curtain. Note: your curtain panel should remain the same length, e.g. 228cm long, and will contain the heading tape. The reason for unpicking and cutting away the original hem is to reduce possible bulk when attaching the bottom curtain panel.
Step 6: Using the French seam method (front fabric): place the wrong side of the fabric together and sew 1.5cm from the raw edges. Trim to 0.5cm and finger press/iron the seam.
Step 7: Still working with the same piece of fabric: turn the fabric over so that the right sides of the fabric are now facing each other. Next sew 1.5cm from the edges. You should have a neat seam at the front and a tube at the back of the curtain, which conceals any frayed edges.
Step 8: Now working with the lining: repeat steps 5-7.
Step 9: Side seams: turn the curtain (lining and fabric) inside out and pin both side edges together. Sew along the line of the original seam (approx. 0.5cm from outer edge).
Step 10: Finishing: turn the fabric right side out and finish off each bottom corner (hand stitch or machine stitch on the diagonal). Iron curtains and hang.
This method is much faster than making curtains from scratch (i.e the heading tape is already in place) and can be very economical if you are able to buy ready-made curtains in the sales. For example, the average cost of fabric by the meter is £20 and I would have needed six and a half meters at least, per window (not including the lining or heading tape). By contrast, the total cost of these curtains was just under £45; a saving of £85 per window. SCH


